

Are you having trouble with a loose treadmill belt? Don’t worry, we’ve got you covered! In this article, we’ll show you the step-by-step process of how to tighten a treadmill belt like a pro. Whether you’re a seasoned gym-goer or just starting your fitness journey, a properly tightened treadmill belt is crucial for a safe and effective workout. So grab your tools and get ready to learn how to keep your treadmill running smoothly and securely.

This image is property of garagegympro.com.
Preparation
Before you start tightening your treadmill belt, it’s important to gather the necessary tools and ensure you take the proper safety precautions. Gather a wrench or an Allen wrench (depending on the type of bolts on your treadmill), a straight edge or a ruler, and a cleaning cloth. Make sure to wear proper workout attire and closed-toe shoes to protect your feet during the process.
Ensuring safety precautions is crucial to avoid any accidents or injuries. Before working on your treadmill, make sure it is completely unplugged from any power source. This will prevent any accidental start-ups while you’re working on the belt. Additionally, it is recommended to use a treadmill mat or place the treadmill on a non-slip surface to provide stability and prevent any slipping or movement during the tightening process.
Identify the Problem
The first step in tightening a treadmill belt is to identify the problem. There are two common issues that could be causing your treadmill belt to feel loose or misaligned: a loose belt or a belt misalignment.
To check for a loose belt, simply stand on the side rails of your treadmill and turn the belt by hand. If it feels loose and slips easily, then tightening is necessary. On the other hand, if the belt seems tight but still feels misaligned when you walk or run on it, then you’ll need to address the belt alignment.
Loosening the Belt (if necessary)
Before tightening the belt, you may need to loosen it to make the adjustment easier. Start by unplugging your treadmill from the power source. Safety should always come first to avoid any potential accidents while working on your equipment.
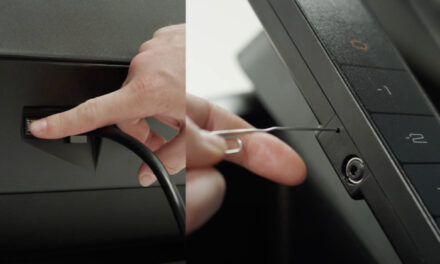
Once the treadmill is unplugged, locate the rear roller bolts. These bolts are typically found at the back of the treadmill near the walking or running belt. Use your wrench or Allen wrench to loosen these bolts, turning them counterclockwise. Loosen them just enough to allow the belt adjustment.
Tightening the Belt
Now that the belt is loose, it’s time to tighten it properly. Start by plugging the treadmill back into the power source and ensuring it is in a safe and stable position.
To tighten the belt, locate the tension bolts on either side of the treadmill near the front roller. These bolts are used to adjust the tension of the belt. Using your wrench or Allen wrench, turn the tension bolts clockwise to tighten them. Start with a small adjustment, typically no more than a quarter of a turn, and then test the belt tension.
Check the belt tension by walking or running on the treadmill at a slow speed. Pay attention to how it feels under your feet. If the belt feels too loose or slips, continue tightening the tension bolts gradually until the desired tension is achieved. It’s important not to overtighten the belt, as this can cause unnecessary strain on the motor and other components of the treadmill.

This image is property of i.ytimg.com.
Aligning the Belt
If the belt appears misaligned even after tightening, it’s essential to align it properly. A misaligned belt can cause uneven wear and compromise your workout experience. To align the belt, follow these steps:
-
Center the Belt: Start by ensuring the belt is centered on the treadmill deck. Use your finger or hand to gently nudge the belt toward the center if it seems to be leaning more towards one side.
-
Align the Belt with a Straight Edge: Place a straight edge or ruler along the sides of the treadmill deck. Make sure it’s flush against the edges. Observe the gap between the straight edge and the edges of the belt. If the gap is uneven, adjust the belt accordingly by using the appropriate tension bolts. Repeat the tightening process if necessary.
Testing the Belt Tension
Once you’ve tightened and aligned the belt, it’s time to test the tension to ensure it meets your preference. Start by plugging the treadmill back in and making sure it’s in a stable position.
To test the belt tension, start the treadmill at a slow speed and stand on the side rails. Reach down and press your finger against the middle of the belt. The tension should feel firm but not overly tight. There should be some give, but the belt should not slip or feel too loose. Adjust the tension bolts as needed to achieve the desired belt tension.

This image is property of support.horizonfitness.com.
Repeating the Process (if necessary)
If you’ve followed the steps above and the treadmill belt still feels loose or misaligned, don’t worry! Sometimes, it may take a few adjustments to find the perfect tension for your specific treadmill. If needed, repeat the steps outlined above, starting from loosening the belt if necessary, until you achieve the desired tension and alignment.
Remember to make small, gradual adjustments to avoid over-tightening or misaligning the belt. It’s better to take your time and make multiple small adjustments than to rush and potentially damage your treadmill.
Maintaining the Treadmill Belt
Once you have successfully tightened and aligned your treadmill belt, it’s important to maintain it regularly to ensure optimum performance and longevity. Here are a couple of maintenance tips to keep your treadmill belt in excellent condition:
-
Regularly Clean the Belt: Sweat and dust can accumulate on the belt over time, affecting its performance and lifespan. Use a clean, damp cloth to wipe down the belt after each workout session. Avoid using harsh chemicals or abrasive materials that could damage the belt’s surface.
-
Lubricate the Belt: Depending on the type of treadmill you have, it may require periodic lubrication to reduce friction and ensure smooth operation. Refer to your treadmill’s user manual for specific instructions on how and when to lubricate the belt. Use a treadmill lubricant approved by the manufacturer for optimal results.

This image is property of i.ytimg.com.
Seeking Professional Help
If you’re unsure about tightening the treadmill belt yourself or encounter any issues during the process, it’s always a good idea to consider professional service. Seeking assistance from authorized service technicians can provide peace of mind and ensure that the belt is tightened correctly without causing any damage to your treadmill.
Authorized service technicians have the expertise and knowledge to diagnose and resolve any treadmill belt issues efficiently. They can also provide additional maintenance recommendations specific to your treadmill model.
Conclusion
Proper maintenance of your treadmill belt is vital for optimum performance and an enjoyable workout experience. By following the steps outlined in this article, you’ll be able to tighten and align your treadmill belt with ease. Remember to gather the necessary tools, prioritize safety precautions, and make small adjustments until you achieve the desired tension and alignment.
With a well-tightened treadmill belt, you can confidently power through your workouts, knowing that your treadmill is operating at its best. Don’t forget to regularly clean and lubricate the belt to maintain its longevity and ensure smooth operation. So, lace up your shoes, hop on the treadmill, and enjoy your workout with a well-tightened belt!

This image is property of www.jllfitness.co.uk.
