
Looking to replace a worn-out treadmill belt? Look no further! In this article, we’ll guide you through the simple steps to get your treadmill up and running smoothly again. Whether you’re a seasoned fitness enthusiast or a beginner just starting your fitness journey, we’ve got you covered. With our easy-to-follow instructions, you’ll be able to replace your treadmill belt in no time and get back to enjoying your workouts. So, grab your tools and let’s get started on getting your treadmill in top shape!

This image is property of i.ytimg.com.
Preparing for Belt Replacement
Replacing a treadmill belt can seem like a daunting task, but with the right tools and a little patience, you can do it yourself and save some money. Before you begin, gather all the necessary tools to ensure a smooth and efficient process. You’ll need a wrench or Allen key to loosen and tighten bolts, a screwdriver for removing screws, and possibly a socket wrench for certain models. Having these tools ready will make the job much easier and prevent any unnecessary delays.
Identifying the Belt Type
Treadmill belts come in various sizes and types, so it’s important to identify the correct belt for your specific model. Refer to your treadmill’s user manual or check the manufacturer’s website for information on the correct belt type. Make note of the belt’s dimensions, such as its length and width, as well as any other specifications. This will ensure that you order the right replacement belt for your treadmill and avoid any compatibility issues.
Ordering a Replacement Belt
Once you’ve identified the correct belt for your treadmill, it’s time to order a replacement. You can order directly from the manufacturer or from reputable online retailers. When ordering, double-check all the specifications to ensure you’re purchasing the correct belt. It’s also a good idea to read customer reviews to verify the quality and durability of the replacement belt. Ordering from a trusted source will give you peace of mind knowing that you’re getting a reliable product.
Safety Precautions
Before you start working on your treadmill, it’s crucial to take proper safety precautions. Disconnecting the power source is the first step to ensure your safety during the belt replacement process. Locate the power cord and unplug it from the outlet. This will prevent any accidental starts or electrical mishaps while you’re working on the treadmill. Additionally, be sure to remove the safety key if your treadmill is equipped with one. This will further prevent accidental starts and keep you safe.
Clearing the surrounding area is another essential safety precaution. Remove any objects or obstacles near the treadmill to create a safe working environment. This will prevent tripping hazards and ensure that you have enough space to maneuver the treadmill during the belt replacement process. Taking these simple safety precautions will help you avoid accidents and injuries while working on your treadmill.

This image is property of images.ctfassets.net.
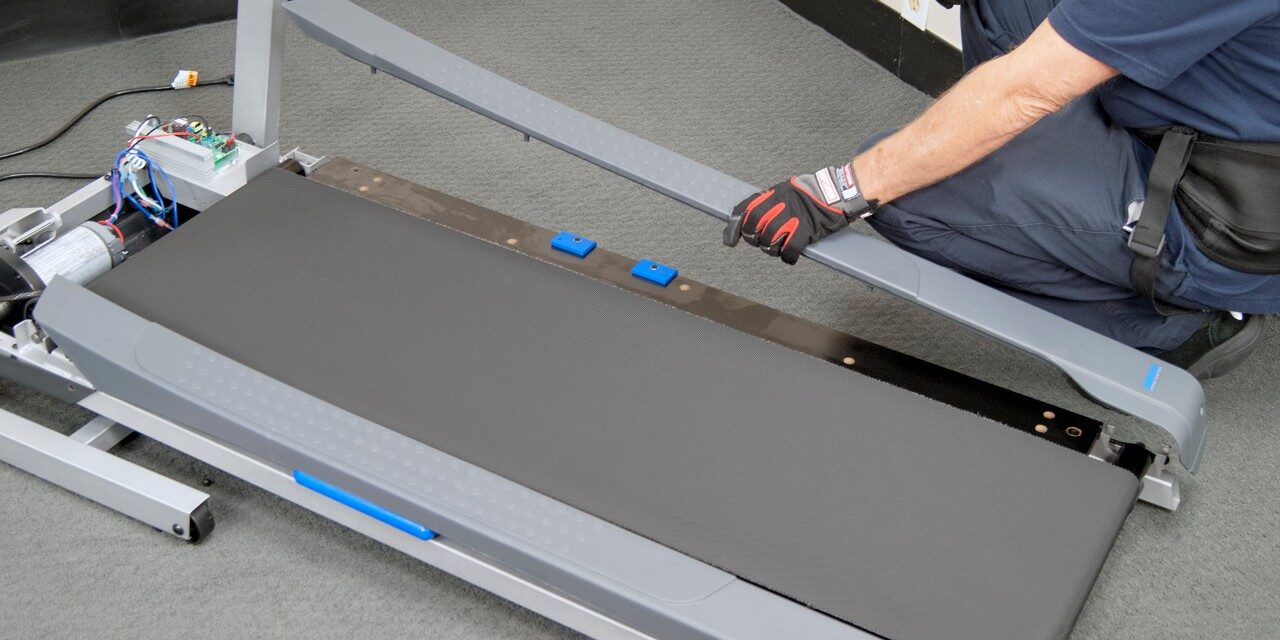
Removing the Old Belt
Now that you’ve taken the necessary safety precautions, it’s time to remove the old belt from your treadmill. Start by lifting the treadmill deck to gain access to the belt. Most treadmills have a latch or knob that allows you to lift the deck. Once the deck is lifted, you can easily access the belt underneath.
Next, you’ll need to loosen and remove the rear roller. Use a wrench or an Allen key to loosen the bolts securing the roller. Once the bolts are loosened, slide the roller out, and set it aside. With the rear roller removed, you can now slide the old belt off the front roller. Take your time and ensure that the belt is completely free from the roller before proceeding.
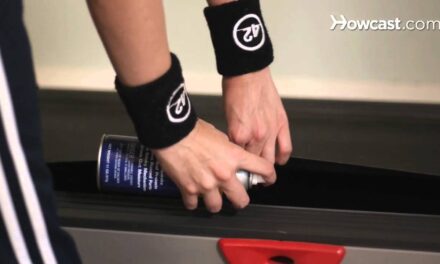
Inspecting and Cleaning the Deck
With the old belt removed, it’s a good idea to inspect the treadmill deck for any signs of damage or wear. Check for cracks, signs of excessive wear, or any other issues that may affect the performance of the new belt. If you notice any damage, it’s best to address it before installing the new belt.
Once you’ve inspected the deck, it’s time to clean the surface. Dust, dirt, and debris can accumulate on the deck over time, affecting the performance of the new belt. Use a damp cloth or sponge to wipe down the deck and remove any dirt or debris. Pay special attention to the edges and corners of the deck, as these areas can accumulate more dirt. Cleaning the deck thoroughly will ensure a smooth and long-lasting performance from your new belt.
If your treadmill manufacturer recommends deck lubrication, this is the time to apply it. Follow the manufacturer’s instructions for the type and amount of lubrication to use. Lubricating the deck can reduce friction and prolong the life of the belt. However, not all treadmills require lubrication, so be sure to check your user manual or consult the manufacturer’s website for specific instructions.

This image is property of i.ytimg.com.
Installing the New Belt
Now that the deck is prepped and ready, it’s time to install the new belt. Start by aligning the belt with the deck. Ensure that the belt is centered and aligned straight with the edges of the deck. A misaligned belt can cause unnecessary wear and affect the performance of your treadmill.
Once the belt is aligned, slide it onto the front roller. Take care to avoid any twists or folds in the belt as you slide it on. Move slowly and methodically, making sure the belt is operating smoothly. If needed, refer to the user manual for your specific treadmill model for any additional instructions or adjustments.
Adjusting the Belt Tension
After installing the new belt, you’ll need to adjust the belt tension to ensure optimal performance. A loose belt can cause slipping or skipping, while an overly tight belt can strain the motor and other components. Most treadmills have an adjustable tension system. Refer to your user manual for instructions on how to adjust the belt tension for your specific treadmill model.
To check the tension, run the treadmill at a slow speed and walk on it for a few minutes. Pay attention to any slipping or skipping of the belt. If necessary, make small adjustments to the tension until the belt runs smoothly and consistently. It may take a few attempts to find the perfect tension, so be patient and persistent.

This image is property of i.ytimg.com.
Reassembling the Treadmill
With the new belt installed and properly tensioned, it’s time to reassemble the treadmill. Start by attaching the rear roller. Slide the roller back into place and secure it with the bolts you loosened earlier. Ensure that the roller is aligned correctly and tightened securely.
Once the rear roller is in place, lower the treadmill deck to its original position. Use caution and make sure your fingers are clear of any moving parts as you lower the deck. Once the deck is lowered, it’s time to reconnect the power cord. Plug the power cord back into the outlet, ensuring a secure connection.
Testing the New Belt
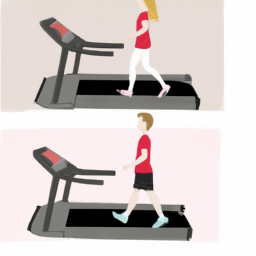
Now that the treadmill is reassembled, it’s time to test the new belt. Start by walking on the treadmill at a slow speed to ensure that the belt is running smoothly. Pay attention to any slipping, skipping, or unusual noises. If you notice any issues, stop the treadmill immediately and make any necessary adjustments to the belt tension.
While walking on the treadmill, check the alignment of the belt. Ensure that it remains centered on the deck and does not veer to one side. If you notice any misalignment, refer to your user manual for instructions on how to adjust the belt tracking for your specific treadmill model. Proper alignment will prevent premature wear on the belt and ensure a comfortable exercise experience.

This image is property of www.topfitnessmag.com.
Troubleshooting
If you encounter any issues with your newly replaced treadmill belt, it’s important to troubleshoot and address them promptly. Here are a few common problems and their possible solutions:
Belt Slipping or Skipping
If your belt is slipping or skipping during use, it may be due to improper tensioning. Adjust the tension system incrementally until the slipping or skipping stops. If the problem persists, you may need to clean the deck or consider replacing the belt with a higher-quality one.
Belt Tracking to One Side
A belt that veers to one side can be frustrating and uncomfortable to use. Check the belt alignment and make any necessary adjustments using the instructions provided by your treadmill manufacturer. If the problem persists, consult a professional for further assistance.
Unusual Noises or Vibrations
If you notice any unusual noises or vibrations coming from your treadmill, it could indicate an issue with the belt installation or other components. Check that all bolts and screws are secure and properly tightened. If the problem persists, consult a professional for a thorough inspection and potential repairs.
Maintaining the New Belt
To ensure the longevity and optimal performance of your new treadmill belt, regular maintenance is essential. Here are some maintenance tips to keep your belt in top condition:
Regular Cleaning and Lubrication
Dust and debris can accumulate on the belt and deck over time, causing friction and wear. Regularly clean the belt and deck surfaces with a damp cloth or sponge to remove any dirt or debris. If your treadmill requires deck lubrication, follow the manufacturer’s instructions for the type and frequency of lubrication.
Monitoring Belt Tension
Check the belt tension periodically to ensure it remains within the recommended range. Over time, the belt may stretch or loosen, requiring adjustment. Use your user manual as a guide for proper belt tensioning techniques and adjustments.
Inspecting for Wear
Regularly inspect the belt for any signs of wear or damage. Look for fraying edges, cracks, or areas of excessive wear. If you notice any issues, consider replacing the belt to maintain optimal performance and prevent potential safety hazards.
Seeking Professional Assistance
While replacing a treadmill belt can often be done yourself, there may be instances where professional assistance is required. Here are a few scenarios where seeking professional help is recommended:
Complex Belt Replacement
If your treadmill model has a complex belt replacement process or requires specialized tools, it’s best to seek assistance from a professional. They will have the expertise and knowledge to handle the intricacies of your specific treadmill model.
Inaccessible Parts or Mechanisms
If you encounter difficulties accessing certain parts or mechanisms during the belt replacement process, it’s best to seek professional assistance. They will have the necessary tools and experience to navigate the tight spaces and ensure a successful installation.
Manufacturer or Warranty Service
If your treadmill is still under warranty or covered by a service agreement, contacting the manufacturer or authorized service provider is the best course of action. They will have qualified technicians who can assess and resolve any issues with your treadmill belt, ensuring that your warranty remains intact.
By following the steps outlined in this article, you can successfully replace your treadmill belt and keep your fitness journey on track. Remember to gather the necessary tools, take proper safety precautions, and seek professional assistance when needed. With a new belt in place, your treadmill will continue to provide you with all the benefits of a great workout for years to come. Happy running!
