
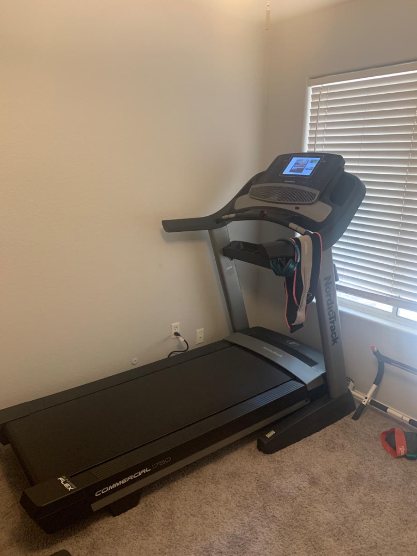
Have you been trying to figure out how to disassemble your Nordictrack treadmill? Look no further because we’ve got you covered! At Fit Gear Gurus, we understand the importance of taking care of your fitness equipment, and knowing how to properly disassemble a treadmill is crucial for maintenance or relocation purposes. In this article, we will guide you through the step-by-step process of disassembling your Nordictrack treadmill, ensuring that you can easily follow along and dismantle your treadmill with ease. So, let’s get started and make disassembling your Nordictrack treadmill a breeze!
Safety Precautions
When disassembling a NordicTrack treadmill, it’s important to prioritize safety. Before you start, make sure to switch off and unplug the treadmill from the power source. This will help prevent any accidental activation of the treadmill while you’re working on it. Additionally, using protective equipment such as gloves and safety goggles can help protect you from any potential injuries during the disassembly process. Lastly, be sure to clear the surrounding area of any obstacles or objects that may hinder your progress or pose a tripping hazard. By following these safety precautions, you can ensure a smooth and safe disassembly process.
Gather the Required Tools
To successfully disassemble a NordicTrack treadmill, having the right tools is essential. Here are the tools you’ll need to gather before getting started:
- Screwdriver: A screwdriver will be needed to remove screws from various parts of the treadmill.
- Allen wrench: An Allen wrench, also known as a hex key, will come in handy for loosening or tightening bolts.
- Adjustable wrench: An adjustable wrench will be useful for tasks that require tightening or loosening nuts and bolts.
- Rubber mallet: A rubber mallet can be used to gently tap and separate parts that may be stuck or connected tightly.
- Pliers: Pliers will be helpful for gripping and manipulating small parts during the disassembly process.
By having these tools on hand, you’ll be well-equipped to tackle the disassembly of your NordicTrack treadmill.
Remove the Console
The console of the treadmill houses the control panel and other electronic components. Here’s how you can remove it:

This image is property of runbryanrun.com.
Disconnect the Power Cord
Start by unplugging the power cord from the treadmill to ensure safety. This will prevent any accidental power supply or electrical shocks during the disassembly.
Unscrew the Console from the Frame
Using a screwdriver or an Allen wrench, locate and remove the screws that secure the console to the frame of the treadmill. Carefully set aside the screws for later reassembly.
Release the Console Cables
Inspect the connections between the console and the treadmill’s electronics. Locate the cables that connect the console to the rest of the treadmill and gently detach them by unplugging or unscrewing the connectors. Take note of the cable arrangement for later reconnection.
By following these steps, you can detach the console from the treadmill’s frame and move on to the next stage of disassembly.
Detach the Handrails
The handrails of a NordicTrack treadmill provide stability and support during exercise. To disassemble them, follow these steps:
Remove the End Caps
At the top and bottom of each handrail, you’ll find end caps. Start by removing these end caps using a screwdriver or a wrench. They are often secured with screws or clips. Set the end caps aside for reassembly.

This image is property of runbryanrun.com.
Loosen and Remove the Screws on the Handlebars
Using a screwdriver or an Allen wrench, locate and loosen the screws that attach the handlebars to the treadmill’s frame. Once loosened, carefully remove the screws and keep them in a safe place.
Disconnect the Handrail Cables
Inspect the connection points between the handrails and the treadmill’s electronics. Similar to the console cables, gently unplug or unscrew the connectors to detach the handrails from the treadmill. Take note of the cable arrangement for later reattachment.
By completing these steps, you’ll be able to detach the handrails from the NordicTrack treadmill, allowing for further disassembly.
Disassemble the Frame
The frame of the treadmill holds all the major components together. Here’s how you can disassemble it:

This image is property of i.ytimg.com.
Remove the Motor Hood
Using a screwdriver or an Allen wrench, locate and remove the screws or bolts that secure the motor hood to the treadmill’s frame. Depending on the model, the motor hood may either lift off or slide out from the frame. Carefully detach the motor hood and set it aside.
Unscrew and Remove the Side Rails
Locate the screws or bolts that secure the side rails to the treadmill’s frame. Use a screwdriver or an Allen wrench to remove these screws and detach the side rails. Make sure to keep track of the removed screws for later reassembly.

This image is property of i.ytimg.com.
Detach the Foot Rails
Underneath the walking belt, you’ll find the foot rails. These are typically secured with screws or bolts. Using a screwdriver or an Allen wrench, remove the screws and detach the foot rails from the frame. Set the foot rails aside for reassembly.
By following these steps, you can disassemble the frame of your NordicTrack treadmill, allowing for further dismantling.
Take Apart the Belt and Deck
The belt and deck are integral parts of the treadmill that require careful disassembly. Here’s how you can proceed:
Release the Tension on the Belt
To release tension on the belt, locate the adjustment screws near the rear roller. Use an Allen wrench to loosen these screws, allowing the belt to become slack. This will make it easier to work with the belt during disassembly.

This image is property of runbryanrun.com.
Remove the Rear Roller
Using a screwdriver or an Allen wrench, locate and remove the screws or bolts that secure the rear roller to the treadmill’s frame. Gently slide the rear roller out of its position and set it aside for later reassembly.
Detach the Front Roller
Similarly, locate the screws or bolts that secure the front roller to the frame. Remove these screws or bolts using a screwdriver or an Allen wrench, and carefully detach the front roller. Set the front roller aside for reassembly.
By following these steps, you can successfully disassemble the belt and deck of your NordicTrack treadmill.
Remove the Motor
The motor of a treadmill is a crucial component that drives the belt and controls various functions. Here’s how you can remove it:
Disconnect the Motor Wires
Locate the connection point between the motor and the treadmill’s electronics. Gently unplug or unscrew the connectors to detach the motor wires. Take note of the wire arrangement for later reconnection.
Loosen and Remove the Motor Mounting Bolts
Using an adjustable wrench or a suitable tool, locate the motor mounting bolts that secure the motor to the frame. Loosen these bolts and carefully remove them one by one. Once all the bolts are removed, lift the motor off the frame.
Lift and Remove the Motor
With the mounting bolts removed, carefully lift the motor off the treadmill’s frame. Take care not to damage any of the surrounding components or wiring. Set the motor aside for safekeeping or further inspection.
By completing these steps, you can remove the motor from your NordicTrack treadmill, clearing the way for further disassembly.
Disassemble the Incline Mechanism
The incline mechanism is responsible for adjusting the treadmill’s slope. Here’s how you can disassemble it:
Lower the Treadmill to the Lowest Incline
Before disassembling the incline mechanism, set the treadmill to its lowest incline position. This will ensure easier access to the components and prevent any accidental movements during the disassembly process.
Remove the Incline Motor Cover
Using a screwdriver or an Allen wrench, locate and remove the screws or bolts that secure the incline motor cover. Carefully detach the cover, revealing the incline motor.
Detach the Incline Motor
Inspect the connection between the incline motor and the treadmill’s frame. Gently unplug or unscrew the connectors to detach the incline motor. Take note of the connectors’ arrangement for later reattachment.
By following these steps, you can disassemble the incline mechanism of your NordicTrack treadmill, allowing for further dismantling.
Dismantle the Shocks and Springs
The shocks and springs in a treadmill contribute to its cushioning system and provide a smoother running experience. Here’s how you can dismantle them:
Remove the Shocks
Locate the shocks attached to the frame of the treadmill. Using a screwdriver or an Allen wrench, remove the screws or bolts that secure the shocks. Carefully detach the shocks from the frame and set them aside.
Detach the Springs
Inspect the connection points of the springs to the frame and other components. Depending on the design, springs may be attached with screws or clips. Using appropriate tools, remove the attachments and detach the springs.
Take Out the Cushioning System
With the shocks and springs removed, the cushioning system can now be taken out. Carefully lift the cushioning system off the frame, making sure to avoid any damage to the surrounding components.
By completing these steps, you can dismantle the shocks, springs, and cushioning system of your NordicTrack treadmill.
Conclusion
Disassembling a NordicTrack treadmill requires patience, attention to detail, and the right tools. By following the step-by-step instructions outlined in this article, you’ll be able to safely and effectively disassemble your NordicTrack treadmill. Remember to put safety first, gather all the necessary tools, and proceed with caution. Whether you’re dismantling the console, handrails, frame, belt and deck, motor, incline mechanism, or shocks and springs, taking the time to carefully disassemble each component will ensure a successful disassembly process. Good luck with your disassembly project!
