Are you looking to replace the belt on your treadmill? Look no further! In this article, we will provide you with a step-by-step guide on how to replace a treadmill belt. Whether you are an experienced DIY-er or a first-time treadmill owner, we have got you covered. Don’t worry, it’s easier than you think! Just follow along and soon you’ll be back to your daily runs in no time. Let’s get started!
This image is property of i.ytimg.com.
Assessing the Problem
Identifying signs of a worn-out treadmill belt
Is your treadmill belt showing signs of wear and tear? Look out for frayed edges, cracks, or visible damage to the surface of the belt. If you notice these signs, it may be time to replace your treadmill belt.
Checking the tension of the belt
To check the tension of the treadmill belt, start by turning off the power and unplugging the treadmill. Then, using your fingers, press down on the middle of the belt. If it feels loose and you can easily lift it more than an inch off the deck, the belt might be too loose and require adjustment or replacement.
Determining if you need to replace the belt
If your treadmill belt is worn out, has visible damage, or if it fails the tension test, it’s time to replace it. A worn-out belt can cause issues with safety, performance, and overall functionality of your treadmill. Replacing the belt will ensure a smooth and safe workout experience.
Gathering the Necessary Tools
Tools required for belt replacement
Before you begin the replacement process, make sure you have the necessary tools on hand. You will need a screwdriver (usually Phillips or flathead), an Allen wrench, and a belt tension gauge. These tools will help you remove the old belt and install the new one correctly.
Ensuring you have the correct replacement belt
To ensure a successful replacement, it is crucial to have the correct replacement belt for your specific treadmill model. Check the owner’s manual or contact the manufacturer to determine the appropriate belt size and type for your treadmill. Using an incorrect belt may result in poor performance or even damage to your treadmill.
Other materials needed for the replacement process
In addition to the tools, you will also need some other materials to successfully replace the treadmill belt. These include a cleaning solution, a lint-free cloth or towel, and a suitable lubricant for treadmill belts. These materials will aid in preparing the treadmill and ensuring proper functionality after the belt replacement.

This image is property of i.ytimg.com.
Preparing the Treadmill
Disconnecting the treadmill from power
Safety should always be the top priority when working with any electrical equipment. Before starting the belt replacement process, make sure to disconnect the treadmill from the power source. Unplug the treadmill and, if possible, switch off the circuit breaker for added safety.
Raising the treadmill deck
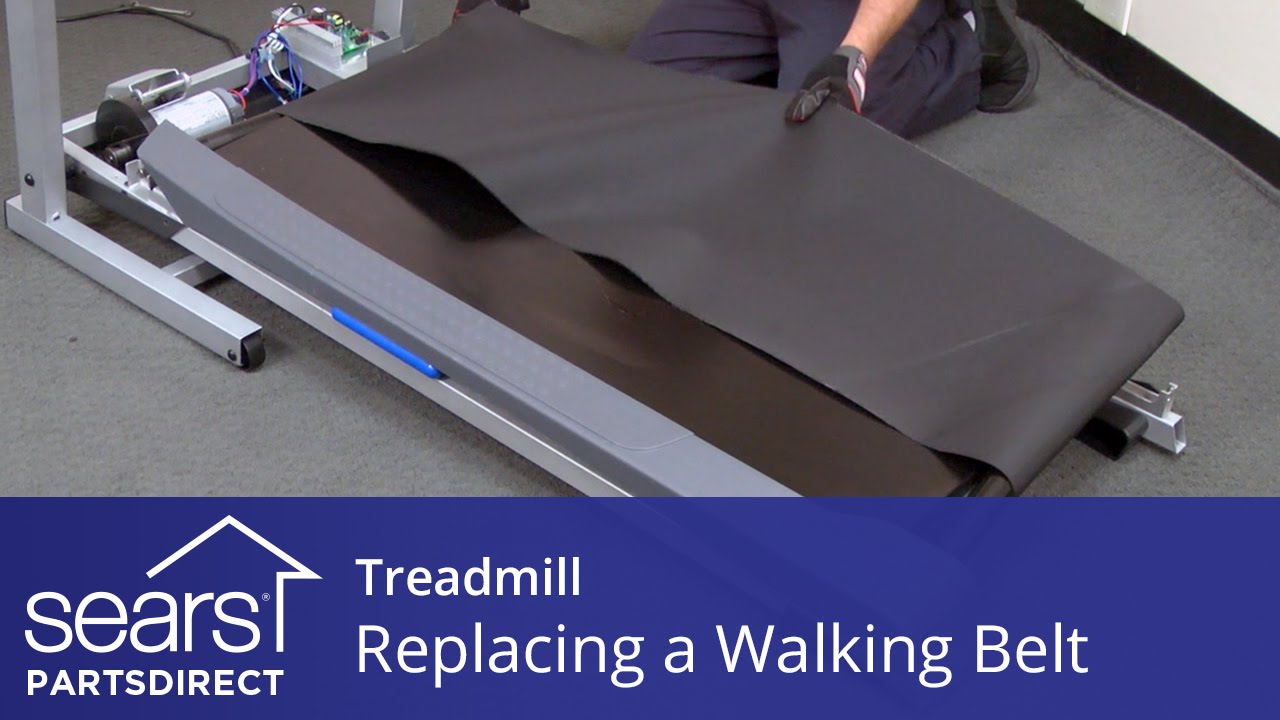
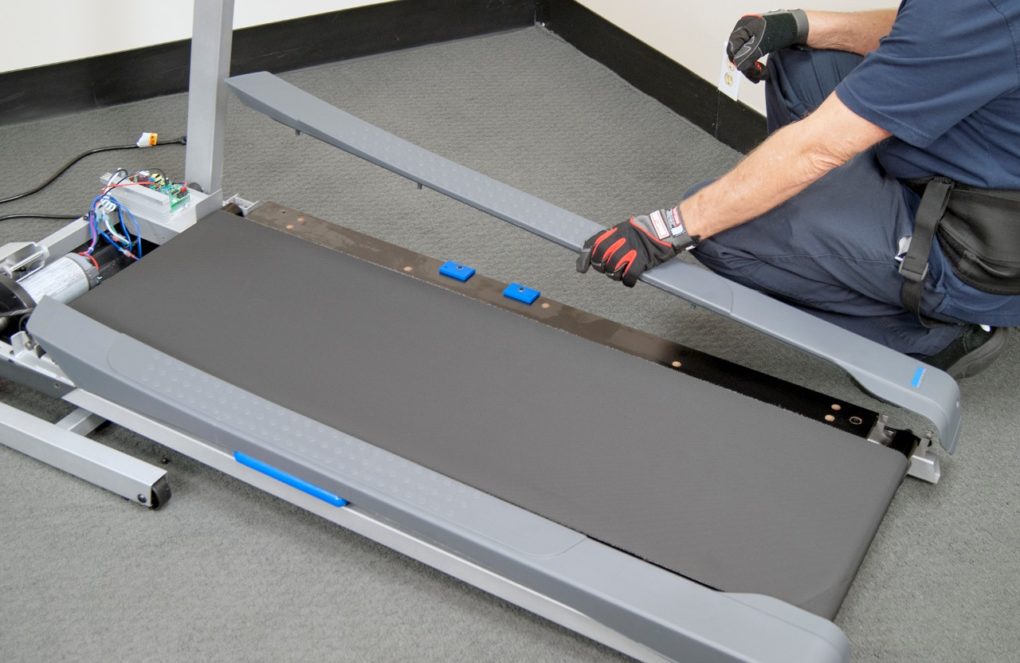
To access the old belt and prepare for its removal, you will need to raise the treadmill deck. Most treadmills have a hydraulic or manual lifting mechanism specifically designed for this purpose. Follow the manufacturer’s instructions to safely raise the deck and gain access to the belt.
Removing the old belt
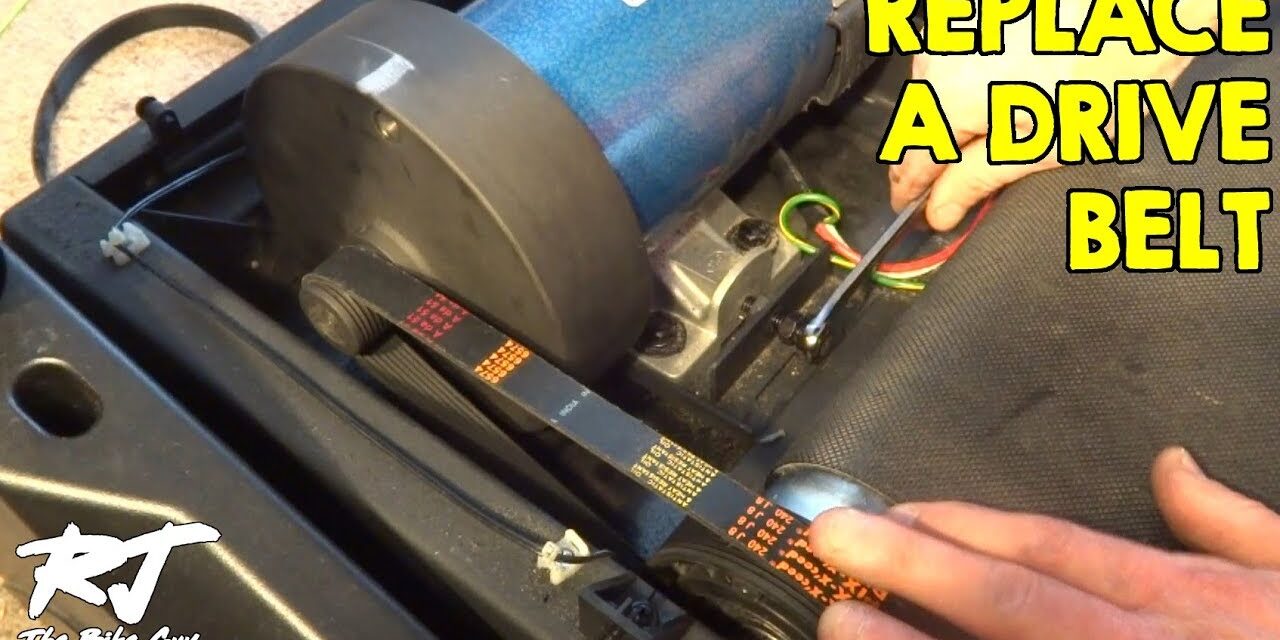
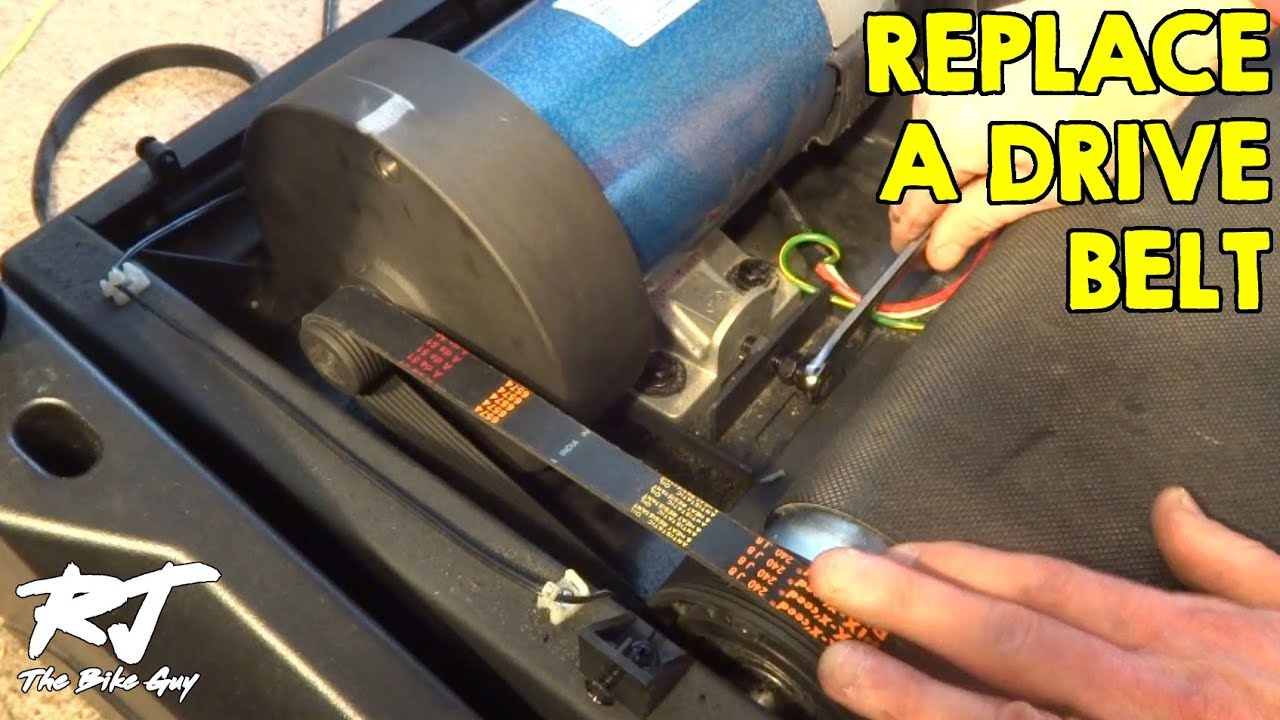
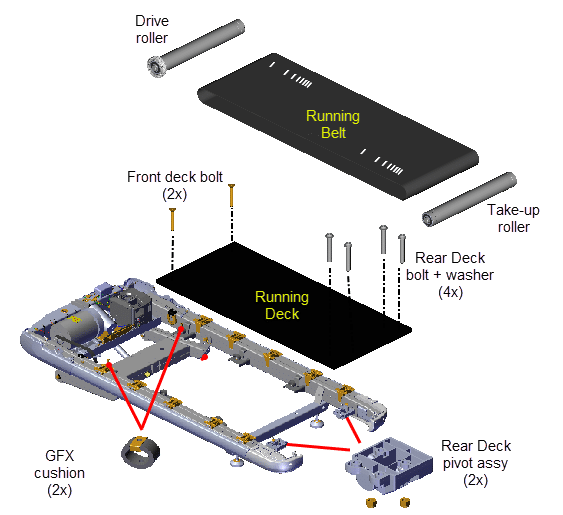
With the treadmill deck raised and accessible, it’s time to remove the old belt. Begin by loosening the tension on the belt using the appropriate tools. Once the tension is released, carefully lift the belt off the deck, making sure to disconnect it from the motor and any other attachments.
Cleaning the treadmill deck
Before installing the new belt, it’s important to clean the treadmill deck thoroughly. Use a cleaning solution specifically designed for treadmills and a lint-free cloth or towel to wipe away any dirt, dust, or debris. A clean deck will ensure optimal performance and longevity of the new belt.
Installing the New Belt
Applying lubrication to the treadmill deck
Before installing the new belt, it is crucial to apply a suitable lubricant to the treadmill deck. Lubrication helps reduce friction between the belt and the deck, promoting smooth movement and preventing excessive wear. Follow the manufacturer’s instructions to apply the lubricant evenly across the deck’s surface.
Placing the new belt on the deck
Take the new replacement belt and carefully place it on the treadmill deck, making sure it is aligned properly. Ensure that the belt is centered and positioned evenly on the deck. Check the manufacturer’s instructions or the owner’s manual for any specific guidelines regarding the belt placement for your treadmill model.
Aligning the belt properly
Proper belt alignment is essential for smooth and safe operation of the treadmill. Use your hands to center the belt and adjust its position so that it is evenly aligned on the treadmill deck. This will ensure that the belt runs straight and prevents any unnecessary wear or slipping.
Adjusting the belt tension
Once the new belt is placed and aligned correctly, it’s time to adjust the belt tension. Use the belt tension gauge to measure the tension and make any necessary adjustments. Follow the manufacturer’s guidelines or the owner’s manual to achieve the recommended tension for your specific treadmill model.
This image is property of www.topfitnessmag.com.
Securing the Belt
Attaching the belt to the motor
With the belt properly tensioned, you can now attach it to the motor. Follow the manufacturer’s instructions or the owner’s manual to locate the motor and the designated attachment points for the belt. Carefully secure the belt to the motor, ensuring it is fastened securely to prevent any slippage during use.
Adjusting the belt alignment if necessary
Take a moment to double-check the belt alignment once it is attached to the motor. If you notice any misalignment or deviation from the center, make the necessary adjustments to ensure that the belt is running straight along the treadmill deck. Proper alignment will prevent excessive wear and friction.
Ensuring proper tension of the belt
After attaching the belt to the motor and aligning it correctly, check the tension once again to ensure it meets the recommended specifications. Use the belt tension gauge to measure and adjust the tension if needed. Proper tension is crucial for optimal performance and longevity of the treadmill belt.
Ensuring Proper Functionality
Lowering the treadmill deck
With the new belt securely installed and properly tensioned, it’s time to lower the treadmill deck back to its original position. Make sure to do this slowly and carefully to avoid any damage to the belt or other components. Lowering the deck will prepare the treadmill for testing and ensure that it is ready for use.
Plugging in the treadmill
Now that the treadmill is back in its original position, it’s safe to plug it back into the power source. Double-check that the power is connected securely and that the circuit breaker is switched on. This step will give you the ability to test the functionality of the new belt and make any necessary adjustments.
Testing the belt for smooth operation
Turn on the treadmill and start slowly testing the new belt for smooth operation. Walk or jog at a moderate pace to ensure that the belt moves smoothly and without any slipping or noise. Pay attention to any unusual sounds, vibrations, or inconsistencies that may indicate a need for further adjustments.
Making necessary adjustments
If you notice any issues during the testing phase, such as belt slipping, misalignment, excessive noise, or uneven tension, take note of them. Depending on the nature of the problem, refer to the troubleshooting section or the manufacturer’s instructions to make the necessary adjustments. It’s important to address any issues promptly to ensure proper functionality of the treadmill.
This image is property of i.ytimg.com.
Maintenance and Care Tips
Regular cleaning of the treadmill belt
To maintain the lifespan and performance of your treadmill belt, it’s crucial to clean it regularly. Use a lint-free cloth or towel to wipe away any dirt, sweat, or debris that may accumulate on the belt’s surface. Regular cleaning will prevent premature wear and ensure smoother operation.
Periodic lubrication for smooth operation
Just like during the installation process, it’s important to periodically lubricate the treadmill deck to promote smooth operation. Refer to the manufacturer’s recommendations to determine the appropriate frequency for lubrication. Follow the instructions provided and use a suitable lubricant designed specifically for treadmill belts.
Checking and adjusting belt tension
To ensure ongoing optimal performance, periodically check the belt tension and make any necessary adjustments. Over time, the belt may stretch or become loose, affecting its performance and safety. Use the belt tension gauge to measure the tension and follow the manufacturer’s instructions to achieve the recommended specifications.
Inspecting for signs of wear and tear
Regularly inspect the treadmill belt for signs of wear and tear. Look for any frayed edges, cracks, or visible damage on the surface of the belt. Additionally, pay attention to any unusual sounds or vibrations during use. If you notice any of these signs, it may be time to consider replacing the treadmill belt to maintain safety and performance.
Troubleshooting Common Issues
Belt slipping or sliding off
If you experience issues with the belt slipping or sliding off during use, there may be an alignment or tension problem. Check the belt alignment and tension, making any necessary adjustments as outlined in the earlier sections. If the problem persists, consult the troubleshooting section of the owner’s manual or seek professional help.
Belt misalignment
An improperly aligned belt can cause issues with performance and wear. If you notice misalignment of the belt during use, stop the treadmill and follow the steps outlined in the earlier sections to realign it. Double-check the motor attachment points and use your hands to center the belt on the treadmill deck.
Excessive noise from the belt
Unusual or excessive noise coming from the treadmill belt can be a sign of issues that require attention. Stop the treadmill and inspect the belt for any visible signs of wear, damage, or foreign objects. Additionally, check the tension and alignment of the belt. If the noise persists, consult the troubleshooting section or seek professional assistance.
Uneven belt tension
If you notice inconsistencies or uneven tension along the treadmill belt during use, it may affect the overall performance and safety of your treadmill. Use the belt tension gauge to measure the tension at different points along the belt and make any necessary adjustments. Proper tension will ensure a smooth and balanced workout experience.
This image is property of garagegympro.com.
Safety Precautions
Always disconnecting power before working
Before performing any maintenance or repair tasks on your treadmill, always disconnect it from the power source. Unplug the treadmill and switch off the circuit breaker if possible. This precaution will prevent any accidental power activation and ensure your safety while working on the treadmill.
Using caution when handling heavy components
During the belt replacement process, you may need to handle heavy components such as the treadmill deck or motor. Use caution and proper lifting techniques to prevent any strain or injury. If necessary, seek assistance from another person to ensure safe and secure handling of these components.
Avoiding excessive tension on the belt
While adjusting the belt tension, avoid applying excessive force that may strain or damage the belt or other components. Follow the manufacturer’s recommendations and use the appropriate tools to achieve the proper tension. Applying excessive tension can lead to premature wear and cause the belt to stretch or slip.
Following manufacturer’s instructions
Throughout the belt replacement process, it is crucial to follow the manufacturer’s instructions or the guidelines provided in the owner’s manual. Different treadmill models may have specific procedures or requirements for belt replacement. By adhering to the manufacturer’s instructions, you will ensure that the process is performed correctly and that your treadmill functions optimally.
When to Seek Professional Help
Complex belt replacement procedures
If the belt replacement process seems too complex or overwhelming, or if you encounter unexpected difficulties, it may be best to seek professional help. Treadmill technicians are experienced and knowledgeable in performing belt replacements and can ensure the job is done safely and correctly.
Motor or other parts requiring expertise
If you believe the issue lies beyond just the belt, such as problems with the motor or other internal parts, it is advisable to consult a professional. Treadmill motors and intricate components require specialized knowledge and expertise to diagnose and repair.
Limited knowledge or experience with treadmills
If you have limited knowledge or experience with treadmills, it’s always better to err on the side of caution and seek professional assistance. Treadmills can be complex machines, and attempting repairs or replacements without the necessary expertise may lead to additional damage or safety hazards.
By following the steps outlined in this article and taking proper care of your treadmill, you can ensure the longevity and optimal performance of your treadmill belt. Regular maintenance, inspections, and necessary replacements will help you maintain a safe and enjoyable workout experience on your treadmill. Remember to prioritize safety, follow the manufacturer’s instructions, and seek professional help when needed to ensure that your treadmill operates smoothly for many workouts to come.

