
If you’ve ever experienced the frustrating issue of your treadmill belt slipping, you know just how annoying it can be. But fear not, because in this article, we’re going to give you the know-how to fix this problem once and for all. Whether you’re a seasoned athlete or just starting your fitness journey, a slipping treadmill belt can throw off your workout and hinder your progress. So, let’s dive into some practical tips and tricks that will help you get your treadmill back on track and running smoothly.
Common Causes of Treadmill Belt Slipping
Slipping of the treadmill belt is a common problem that many treadmill owners face. It can be frustrating and even dangerous if not addressed promptly. Understanding the common causes of treadmill belt slipping is the first step towards finding a solution. Here are some of the most common causes:
Loose Belt Tension
One of the main causes of treadmill belt slipping is loose belt tension. Over time, the belt tension can become loose, causing it to slip as you walk or run on the treadmill. This issue can occur due to regular usage or improper maintenance. However, it can easily be fixed by adjusting the belt tension.
Worn Belt
Another common cause of treadmill belt slipping is a worn-out belt. Over time, the constant friction between the belt and the deck can cause it to wear down. This can lead to reduced traction and an increased likelihood of slipping. Regular inspection and replacement of worn belts are essential to maintain optimal treadmill performance.
Lubrication Issues
Lubrication plays a crucial role in ensuring the smooth functioning of the treadmill belt. If the belt is not adequately lubricated, friction can build up, causing it to slip. Lubrication issues can arise due to improper application or lack of lubricant. Regularly checking the lubrication and applying the recommended lubricant can help prevent belt slipping.
Debris Build-up
Debris build-up is another factor that can contribute to treadmill belt slipping. Dust, dirt, and small particles can accumulate on the belt and in the deck, affecting the traction. This build-up can hinder the movement of the belt and cause it to slip. Regular cleaning of the belt and deck can prevent debris build-up and maintain optimal performance.
Misaligned Belt
A misaligned belt can also lead to belt slipping. If the alignment of the belt is off, it may not track properly, causing it to slip to one side or the other. This misalignment can occur over time due to regular usage or incorrect adjustments. Ensuring proper alignment is necessary to prevent belt slipping and maintain a safe and effective workout.
Worn Motor Drive Belt
The motor drive belt is responsible for transferring power from the motor to the treadmill belt. If the motor drive belt becomes worn or loose, it can affect the overall performance of the treadmill and contribute to belt slipping. Regular inspection and replacement of the motor drive belt are essential to prevent this issue.
Adjusting the Belt Tension
If you notice that your treadmill belt is slipping, adjusting the belt tension can help resolve the issue. Here’s how you can do it:
Checking the Belt Tension
Start by checking the current tension of the belt. Turn off the treadmill and unplug it for safety. Use a wrench to rotate the rear roller and lift the belt in the middle. A properly tensioned belt should have a lift of around two to three inches. If the lift is more or less than this, you may need to adjust the tension.
Tightening the Belt
To tighten the belt, locate the adjustment bolts at the rear end of the treadmill. These bolts control the tension of the belt. Gradually tighten each bolt clockwise, ensuring equal tension on both sides. Check the tension of the belt after each adjustment until it reaches the recommended lift of two to three inches.
Aligning the Belt
In addition to adjusting the tension, it’s important to check the alignment of the belt. A misaligned belt can also cause slipping. To align the belt, turn on the treadmill and observe its movement. If you notice any sideways drift or misalignment, make small adjustments to the rear roller bolts until the belt runs straight and centered.
Testing the Belt Tension
After adjusting the tension and aligning the belt, it’s essential to test the belt tension before using the treadmill. Start the treadmill at a slow speed and gradually increase it. Walk or run on the treadmill and observe if the belt slips. If it does, you may need to recheck the tension and alignment or seek professional assistance.

This image is property of i.ytimg.com.
Replacing the Belt
If your treadmill belt is worn beyond repair or if adjustments do not resolve the slipping issue, it may be necessary to replace the belt. Here’s how you can go about it:
Identifying a Worn Belt
Inspect the belt for signs of wear and tear. Look for cracks, fraying edges, or significant thinning. If the belt shows any of these signs, it is likely worn and needs replacement. It’s important to choose a replacement belt that matches your treadmill’s specifications to ensure proper fit and performance.
Purchasing a Replacement Belt
Contact the treadmill manufacturer or check their website for replacement belts. Provide them with your treadmill’s model number and any specific requirements. Alternatively, you can consult with a fitness equipment specialist or visit an authorized dealer to find a suitable replacement belt.
Removing the Old Belt
To remove the old belt, start by turning off and unplugging the treadmill. Locate the roller at the rear end of the treadmill and carefully loosen the adjustment bolts on both sides. Slowly slide the old belt off the deck and roller. Take note of how the belt was positioned for easier installation of the new belt.
Installing the New Belt
Place the new belt on the deck, ensuring it is centered and straight. Align the belt with the pulley on the motor drive. Gradually tighten the adjustment bolts on both sides, stretching the new belt over the roller. Use caution during this process to prevent any damage to the belt or other treadmill components.
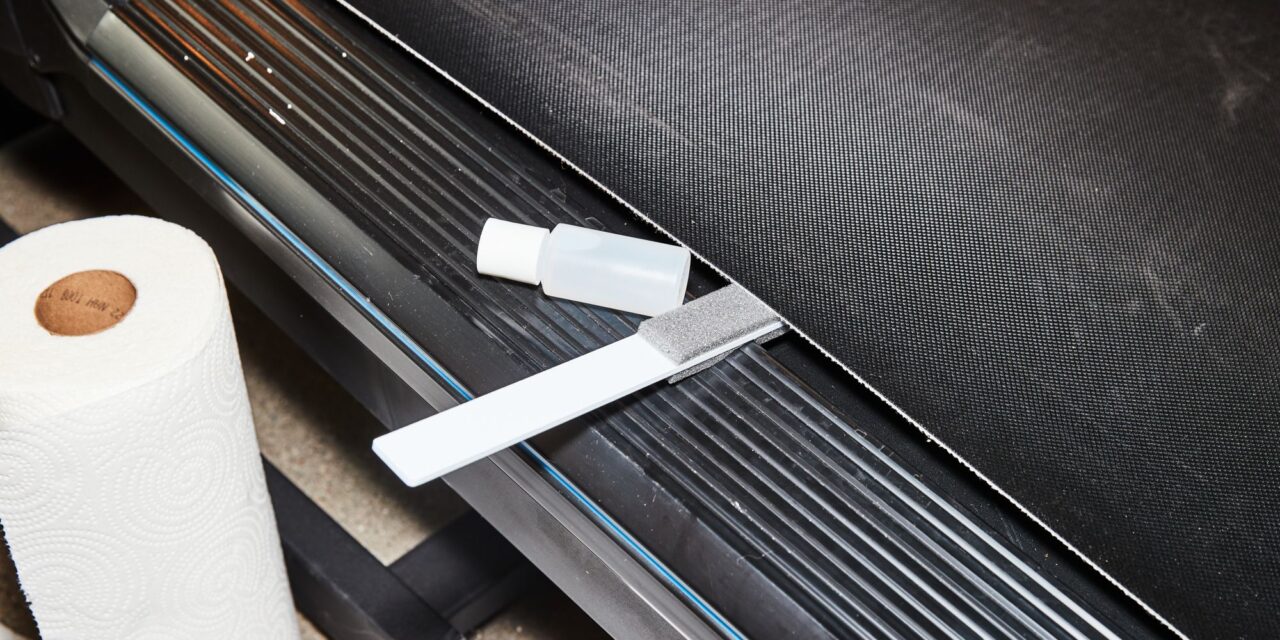
Lubrication Maintenance
Regular lubrication of the treadmill belt is essential to prevent friction and ensure smooth movement. Here’s how you can maintain proper lubrication:
Checking the Lubrication
Refer to your treadmill’s manual to determine the recommended lubrication schedule and lubricant type. Some treadmills have self-lubricating belts, while others require manual lubrication. Check the lubrication ports or instructions provided by the manufacturer to ensure the lubrication level is adequate.
Applying Lubricant to the Belt
If manual lubrication is required, follow the manufacturer’s instructions on how to apply the lubricant properly. Typically, a silicone-based lubricant is recommended for treadmill belts. Apply the lubricant evenly on the underside of the belt, following the guidelines provided. Avoid over-lubrication, as it can lead to belt slipping or other issues.
Cleaning Debris Build-up
Regular cleaning of the treadmill belt and deck can help prevent debris build-up and maintain optimal performance. Here’s how you can do it:
Inspecting for Debris
Before cleaning, inspect the belt and deck for any visible debris or particles. Use a flashlight if necessary to identify any hard-to-see residue. Pay close attention to areas where the belt and deck meet, as debris tends to accumulate in these areas.
Cleaning the Belt and Deck
Use a clean, damp cloth to wipe the belt and deck, removing any visible debris or dust. Be gentle when cleaning to avoid any damage to the belt. Avoid using harsh chemicals or abrasive materials, as they can damage the belt or deck surface. Once cleaned, allow the belt and deck to air dry before using the treadmill.
Adjusting the Belt Alignment
Proper belt alignment is crucial for smooth and safe treadmill operation. Here’s how you can adjust the belt alignment:
Checking the Belt Alignment
Turn on the treadmill and observe the movement of the belt. If you notice any sideways drift or misalignment, it indicates that the belt needs to be adjusted. Improper alignment can lead to belt slipping and increased wear and tear.
Adjusting the Belt Sides
To adjust the belt alignment, refer to your treadmill’s manual for specific instructions. Typically, there are adjustment bolts or screws on either side of the treadmill near the rear roller. Make small adjustments to these bolts or screws, gradually shifting the belt to the desired alignment. Test the belt movement after each adjustment until it runs straight and centered.
Replacing the Motor Drive Belt
If the motor drive belt is worn or damaged, it can affect the overall performance of the treadmill. Here’s how you can replace the motor drive belt:
Identifying a Worn Motor Drive Belt
Inspect the motor drive belt for signs of wear and tear, such as cracks, fraying, or stretching. If the belt shows any of these signs, it needs replacement. Consult your treadmill’s manual or contact the manufacturer for the specific motor drive belt required for your treadmill model.
Purchasing a Replacement Motor Drive Belt
Contact the treadmill manufacturer or visit their website to purchase a suitable replacement motor drive belt. Provide them with your treadmill’s model number and any additional specifications. Alternatively, consult with a fitness equipment specialist or authorized dealer to ensure you select the correct motor drive belt.
Removing the Old Motor Drive Belt
Before removing the old motor drive belt, turn off and unplug the treadmill for safety. Locate the motor and the pulley system. Carefully disconnect the motor drive belt from the pulley by releasing any tension or loosening any necessary components. Take note of how the old belt was installed to assist with the installation of the new belt.
Installing the New Motor Drive Belt
Place the new motor drive belt on the motor’s pulley system, ensuring it is properly aligned. Apply any necessary tension or adjustments to secure the new belt in place. Consult your treadmill’s manual or follow the manufacturer’s instructions for the specific installation process. Double-check that the belt is correctly installed before using the treadmill.
Checking the Motor
Regularly inspecting and maintaining the motor of your treadmill is important for its longevity and proper functioning. Here’s a guide to help you check and maintain the motor:
Inspecting the Motor
Begin by turning off and unplugging the treadmill. Locate the motor, typically at the front or rear end of the treadmill. Inspect the motor for any loose connections, excessive dust accumulation, or signs of damage. If you notice any issues, it’s advisable to seek professional assistance.
Cleaning the Motor
Use a soft brush or a clean cloth to gently remove any dust or debris from the motor. Be careful not to damage any delicate motor components during the cleaning process. If necessary, you can also use compressed air to blow away any stubborn dirt or dust particles.
Lubricating the Motor
Check the treadmill’s manual or contact the manufacturer to determine if any lubrication is required for the motor. Some motors are self-lubricating and do not require additional lubrication, while others may benefit from a small amount of lubricant applied to specific areas. Follow the manufacturer’s recommendations for proper motor lubrication.

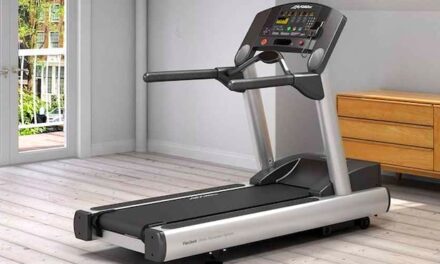
This image is property of garagegympro.com.
Ensuring Proper Treadmill Usage
To prevent belt slipping and ensure a safe and effective workout experience, it’s essential to use the treadmill correctly. Here are some tips to help you:
Using the Correct Speed Settings
Always start your treadmill at a low speed and gradually increase it as you warm up. Avoid abrupt speed changes, as they can increase the risk of belt slipping. Additionally, ensure that you stay within the recommended speed range for your fitness level and workout goals.
Avoiding Excessive Weight on the Belt
Each treadmill has a specific weight limit that it can safely handle. Exceeding this weight limit can strain the motor, belt, and other components, increasing the likelihood of belt slipping. Refer to your treadmill’s manual to determine the maximum weight capacity, and avoid using the treadmill if you exceed this limit.
Regular Maintenance Checks
Perform regular maintenance checks on your treadmill to identify any potential issues before they become major problems. Inspect the belt, deck, motor, and other components for signs of wear, damage, or unusual noises. Follow the recommended maintenance schedule provided by the manufacturer to keep your treadmill in optimal condition.
Seeking Professional Help
While many treadmill belt slipping issues can be resolved through DIY methods, there are instances when professional assistance is necessary. Here’s when you should consider seeking professional help:
When to Seek Professional Assistance
If you have tried the various troubleshooting methods mentioned above and are still experiencing belt slipping issues, it may be time to seek professional help. Additionally, if you are unsure about performing maintenance tasks or lack the required tools or expertise, it is advisable to contact a professional treadmill service technician.
Contacting Treadmill Service Centers
When seeking professional assistance, it’s best to contact authorized treadmill service centers or technicians. They have the necessary experience, expertise, and tools to diagnose and repair treadmill issues effectively. Reach out to the treadmill manufacturer or consult your treadmill’s manual for a list of authorized service centers in your area.
By understanding the common causes of treadmill belt slipping and following the appropriate troubleshooting steps, you can quickly resolve this issue and enjoy a safe and smooth workout. Regular maintenance and proper treadmill usage are key to preventing belt slipping and maximizing the lifespan of your treadmill. Happy exercising!
